Scratch in a network environment

I have been running a Code Club at my local Primary School for a while now, and thought it was about time I put details of a few tweaks I’ve made to the default Scratch install to make things easier. So here goes:

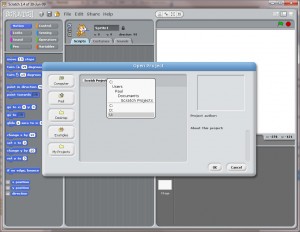
With the default install of Scratch (on Windows) projects are saved to the C: drive. For a network environment, with pupils work stored on a network drive so they always have access whichever machine they sit at, this isn’t exactly helpful. It also isn’t ideal that they can explore the C: drive in spite of profile restrictions (although it isn’t the end of the world as there is little they can do from Scratch).

save-orig

After a bit of time with Google I found the answer, and since it didn’t immediately leap out at me when I was searching I thought I’d post it here (perhaps my Google Fu was weak that day). It is actually quite simple, especially for the average Code Club volunteer I should imagine; just edit the scratch.ini file. This is, as would be expected, located in:

C:\Program Files\Scratch\Scratch.ini

Initially it looks like this:

ini-orig

Pretty standard stuff, but unfortunately no comments to indicate what else you can do with it. As it happens you can add the following two lines (for example):

Home=U:
VisibleDrives=U:

To get this:

ini-new

They do exactly what is says on the tin. If you click on the Home button in a file dialogue box then you only get the drive(s) specified. You can also put a full path in if you want to put the home directory further down the directory structure.

save-new1

The VisibleDrives option restricts what you can see if you click on the Computer button in a file dialogue box. If you want to allow more visible drives then separate them with a comma.

save-new2

You can do the same with a Mac (for the home drive), just use the appropriate directory format (i.e. no drive letter and the opposite direction slash).

There is more that you can do, so take a look at the Scratch documentation here. For example if you use a * in the directory path it is replaced by the name of the currently logged on user.

Depending on your network environment it may be handy for your Code Club to put the extra resources on a shared network drive and open up an extra drive in the VisibleDrives. One I haven’t tried yet it is the proxy setting, which I hope will allow me to upload projects to the Scratch website. It goes something like:

ProxyServer=[server name or IP address]
ProxyPort=[port number]
Windows is weird

I’ve just been putting together a post about some modifications to Scratch for use in a school environment that I have used for the Code Club that I run. Everything went well on the school computers, but when I tried to do the same on my own Windows 7 desktop to get some screenshots things went a little weird.

First off, it is a pain to edit the required .ini file. Right click and edit doesn’t give you administrator privileges so you can save it. My first thought was to run Explorer as administrator, but sadly the administrator privileges don’t extend to Notepad when you right click and choose edit. As it happened I was only going to use Notepad for the screenshots, so I took them and then used Notepad++ to do the actual edit. A quick right click and “Edit with Notepad++” followed by closing it and opening it again with administrator privileges did the trick.

This is where things went from slightly annoying (isn’t Windows always!) to weird. When I ran Scratch my edits to the .ini file didn’t appear to have taken, so I checked the file – fine, nothing wrong there. So this being Windows I decided to try a logout and login just to be sure there wasn’t anything odd going on there. No joy. So I decided to check from the command line with Edit. For some reason when I opened the .ini file up in Edit the extra two lines I had added were missing, so I checked in both Notepad and Notepad++ and they were there. I double checked I was working on the same file and there had been no name change for some strange reason and all was well – or at least I confirmed I was working on the same file.

At this point I realised that the command line I was using wasn’t running as administrator, so I opened up an administrator command prompt and headed to the same directory to edit the file there. The only issue was that when I open it in Edit the two lines I had added were there. This would seem to imply that there are two versions of the file, one for the administrator with the edits and one for my user account without. Although then again, not, since when I edited in the GUI with Notepad or Notepad++ either as administrator or my standard user I did have the edits! This didn’t make much sense. For a moment it looked as though I was going to have to mess around with changing the permissions to work out what was going on. Anyway, I switched to the non-administrative command prompt to edit the file, only to find that my changes have magically appeared (and I hadn’t messed with the permissions yet)! So I tried Scratch again and there we go, the changes are working.

So it would appear that, for some reason, the edits I made to the file (using administrative privileges) took a few minutes and a logout and back in again to be visible to my user account! …and some people wonder why I prefer using Linux!!

Ubuntu ATI driver

A couple of weekends ago I was at OggCamp and the first talk on the Sunday was a good one by LornaJane Mitchell. For one it was a timely reminder of how my IT career started. It was also a virtual kick up the backside to get a bit more use out of my blog. I tend to think in completed articles, but I do have a precedent for short technical comment entries, so here goes more…

I’ve just upgraded my desktop machine, it isn’t exactly state of the art, the new one is only a 3.2GHz P4 and is my first 64 bit desktop, but that’s beside the point. The point is I dropped the old SATA HD into a new box and let Ubuntu get on with the job of sorting out the hardware changes (as an aside Windows 7 put on a bit of a show and then gave up in a huff!).

All went well apart from the graphics, which meant I couldn’t even get the login prompt (I knew I should have stuck with a console and typing startx!! To cut to the chase the solution that worked for me was to boot into the recovery mode kernel and do a one off boot into a safe graphics mode. From here I used the Additional Drivers tool to remove the proprietary ATI driver. This allowed me to reboot into the standard desktop and confirm thins were working, but sadly I couldn’t get above 1024×768 which restricted screen space somewhat.

As it happens I doubt the above was needed because my next action was to boot once more into recovery mode and restore the proprietary driver and reboot. This time when the screen went blank and complained about being ‘out of timing’ I used ALT-F2 to bring up a CLI login and from there used:

sudo aticonfig --initial

This created /etc/X11/xorg.conf, although unfortunately this didn’t make any difference, but it did prepare the ground for:

sudo aticonfig --resolution=0,1280x1024,1024x768

which persuaded the driver to use a more sensible set of parameters that worked with the monitor.

The most notable difference I’ve spotted in the logs so far is that when not working I had the line:

(II) fglrx(0): Setting screen physical size to 423 x 317

whereas when working it is:

(II) fglrx(0): Setting screen physical size to 338 x 270

I’ve not explored whether there is anything else, or what that actually means!

Not to blame for Windows 7

In contrast to the wonders of the recent Microsoft advertising where everyone is trying to claim responsibility for Windows 7 (is it just me that sees this, along with the terrible launch party idea, as a desperate attempt to build the sort of community that open source software has?), I would like to make it publicly known that Windows 7 is not my fault. I’ve been working on installing it recently, and really don’t want to be associated with the palaver involved in doing so!

First off, it totally fails to recognise the controller my hard disk is attached to, so I have to add it in on install. This is a Silicon Image 3512 based SATA PCI card, and it also failed to recognise the ITE 8212 PATA card I tried. Once I’d installed I found that it seemed to think I had a USB2 CDROM drive attached, which I don’t, I don’t have one (well, bar a case in a box that is waiting for an ATAPI DVD-RW to be installed!). It also failed to detect my network card.

So after a reboot, just in case, I decided to take a further look. It seems that Windows 7 lacks drivers for my NIC (SIS 900), SCSI card (Adaptec 2940) and sound card (AC’97, either Realtek of SiS, depending on whether you believe the Gigabyte website or lspci!). The NIC and sound are on the motherboard, whilst the, admittedly old (it was purchased when I built my first 486!) SCSI card is PCI,

So, after some fun with Google, and a bit of downloading, I installed a Windows XP driver for the SiS900, and tried Windows Update. This found 22 updates, totaling around 155M give or take, and proceeded to install. Sadly, 5 updates failed to install properly, including the updated SiS900 driver and the AC’97 audio driver!! The others were the SiS AGP driver, Windows Malicious Software Removal Tool and updates for Windows Defender. Nothing critical then, just network and sound drivers and protection from anything nasty (which you won’t need with no network will you!).

Thankfully, after a reboot, another run of Windows Update, and another reboot, I seem to have a basic install of Windows 7 that works. I just need to decide what to do about the SCSI card, sort out anti-virus, and adjust my network settings (for some reason I seem to have been connected to two when I only have one, and I need to change the workgroup). Then I can start looking at getting some actual software installed to make the machine useful.

Anyone who claims Windows is easier to install and has better driver support than Linux really needs to think again!

BIOS fun

Isn’t playing with a computer BIOS fun? No? Of course it is!

I’m rebuilding my main desktop system at the moment. It isn’t anything spectacularly new, in fact it is based on a Athlon XP 2800+, but it runs Linux (Ubuntu 9.10 currently) with ample performance for my day to day tasks. Windows XP runs on it adequately, when it actually works (I clearly use it too little because it sulks and ‘blue screens’ every few months, requiring a repair or reinstall).

Anyway, as part of this rebuild I decided that it made sense to get everything bang up to date, including the BIOS. The board is obsolete now, so the BIOS was a few years old and should be stable enough – wrong! The board is a Gigabyte GA-7S748-L (GA-7S748 with on board LAN), and was running the F5 revision. Updating was simple enough, just boot of my DOS USB key (yes, I have a USB key with DOS installed!) and run the utility. This brought things up to revision F9, which was the latest, and is where things started to go wrong.

The first thing I noticed was that my Windows 7 installation couldn’t see the HD, so I reached for a driver (Vista was the most up to date) to add during the install process. This didn’t work, and further investigation showed that the BIOS of the PATA PCI card the drives were connected to wasn’t active. It turned out that enabling USB legacy support disabled the card BIOS. Unfortunately, in order to configure the card BIOS you needed a keyboard, and since mine was a USB one, USB legacy support was required to use it – catch 22!! After trying a PCI SATA card instead I found that this was clearly a motherboard issue and not specific to one card or chipset.

So the next thing to do was to back off to the previous BIOS (F8 in this case) to see if the bug had been introduced in the latest BIOS upgrade. Unfortunately it seems that the F8 BIOS was completely bug ridden (so it is a shame it is still available for download). After installing it the computer wouldn’t boot at all, although it would allow use of the BIOS itself. This board has a facility to flash the BIOS from a BIOS based utility (Q-Flash), which sounds pretty handy in this case. Sadly it didn’t work, although thankfully, the failure didn’t damage the installed BIOS any further. After a bit of research with Google, I found that if you disable USB support completely you can boot to a floppy and re-flash the BIOS using a DOS based utility (will DOS ever die?!).

So, with this information I managed to get back to the F5 BIOS and all was working again. Out of curiosity I then tried the F6 BIOS and found that the USB legacy support clash with the PATA card BIOS was introduced there, so presumably exists in F7 too. Back to square one again then, with the original F5 BIOS and a working PC!